Friday, February 25, 2011

Bench Update

When I started my bench I had no place to work. I made the leap and got the top done but didnt have a base for it yet. Well I am finding this has been the best thing that would happen to me. The top is heavy enough in which I can work on it to make the joinery for the base. I sat the bench on saw horses a while back but never did much with it. After drilling the dogholes another world opened up and I was able to use the grammercy holdfasts I bought from TFWW to hold down pieces of my base. I would recommend anyone who builds a bench use the top to build the base.

Here is one of the joints they arent pretty but strong.
IMAG0060

Here is the assemble getting the stretchers that go in the front and back.
IMAG0059

Not much longer work wise will I have left before I finish this bench.

Monday, February 14, 2011

Workbench Continues

Did more work on the bench this weekend along with stuff I had going on. Drilled the Dog holes in the top and used my hold fasts for the first time. I bought the grammercy Hold fasts back in late December.

IMAG0058.jpg

these hold fasts are great and were not a lot of money.
IMAG0057

Tuesday, February 08, 2011

turning pens pt1

a fairly simple process but turning pens starts with your choice of wood. For this pen I chose maple. I have plenty of these blocks of scrap maple.
maple

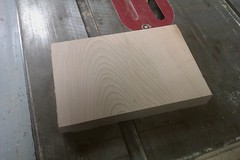
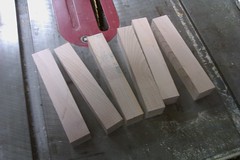
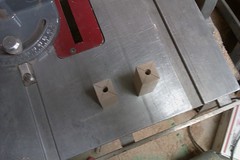
You then cut the maple into square blanks. these are actually a bit larger than they need to be. usually you will make blanks of 3/4 inches by 3/4 inches these are 1 inch square. they are also about 6 inches long
pen blanks maple

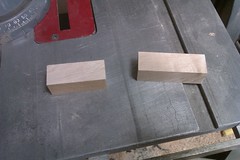
you then cut the blanks to fit the brass tube to be fitted later
blank halved

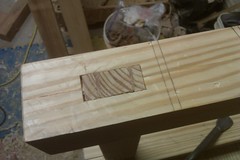
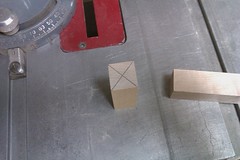
next step is to mark the center and drill out for the brass tube to be inserted.
blank centered

hole drilled

then I used a forsner bit to flush the wood to where the tube is inside the blank. I have also used a sanding wheel to flush them as well. they make a tool that flushes them up and cleans the inside of the tube but for now that is not what I am doing.

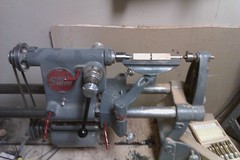
I then mounted the blanks on my lathe with the pen mandrel mounted.
blanks mounted

then with a roughing gouge I turned them round.
tubed rounded

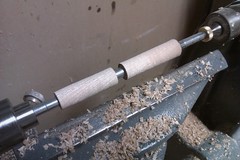
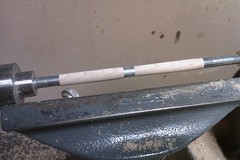
these are as they looked before sanding bringing them down to the bushings in which match the level of the hardware you install the blanks on.
just before sanding

I am thinking I will make this part one since I dont have pictures of where I finished the pen.

Finished another project

A project that has been in the making for about 6 years or so. I told my wife I will build you a jewelry cabinet. It got to be a joke around the family since it had not even been started until about last year. I toiled over the design several times and even restarted it last year after i started it. Once I finally settled on a design that I found pleasing I started building again. I tried to give it a Krenov feel though not sure how successful I was at that. I started off using oak for the majority of the cabinet. Then made up a cedar drawer to fit in the place where I decided it would go. I had some maple I found in my pile to use for the doors. I went back to Oak for the legs and base that would be screwed to the bottom. I finally made a tapered leg project on this one. I got a lathe in the last year just so I could turn spindles or shaker style knobs. The lathe I got to use by turning a couple of shaker style knobs for pulls on this cabinet as well. This has two sets of hook racks for handing necklaces or earrings. I used an oil and wax finish which is by far one of my favorite finishes. Oil and wax yields great results and is a perfect low VOC finish for small shops like mine. It starts with BLO ( boiled linseed oil ) applying till it is no longer needed. Then sand down with 0000 steel wool and rub on wax let film and buff out.

Jewelry cabinetJewelry cabinet